All Posts By: Banu

Home » Articles posted by Banu
kela-kofta

Kela Kofta

In Snack Recipes On January 8, 2015 0 Comments

This Kela Kofta recipe is another version of Kofta recipe. Kela Kofta is a recipe made out of raw bananas or plantain. It is very nutritious and healthy as they contains a high level of proteins, vitamins which useful for the blood regulation. It is very delicious to eat. This recipe made out of green bananas may not be too easy to get hold of, but it is well worth it as this Kela Kofta is an exotic and different dish which has no counterpart in Western cuisine.

Preparation:

  • Boil the raw green bananas for about 10 minutes with their skins until they become tender.
  • Remove from the heat and allow them to cool, then peel off their skin and mash the bananas evenly.
  • Heat the ghee on a pan and fry the onion until it is golden brown.
  • Add ginger and garlic to the onions.

Now add the banana pulp along with the paprika, cardamoms and little salt stirring well. Allow it to cool.

Pour in the egg until you have a soft, pliable dough.

Now shape the mixture into balls approximately a size of a lemon and place it apart.

On a saucepan put the cream and tomato puree together with an pinch of salt and a little ghee and cook it in a medium flame, stirring constantly.

When the gravy starts boiling add the koftas and gently heat for 10 minutes.

Garnish with some coriander leaves and is ready to serve.

chicken-croissant5

Chicken Croissant

In Bread Recipes On October 30, 2014 0 Comments

How to make Chicken Croissant:

Step 1:

(For making dough)

  1. Mix the above ingredients flour, milk powder, yeast, oil, egg, salt and sugar.
  2. Add warm water and knead the dough to medium soft.
  3. Leave it for 1 hour in a warm place.

Step 2:

(For making the chicken filling)

  1. Finely chop the onion, tomato and green chilies.
  2. Heat 2 tbsp of butter in a pan and fry the onion and tomato along with ginger garlic paste.
  3. Now add red chili powder, garam masala, salt and chicken and cook it for few minutes.
  4. Add flour then milk and cook till it becomes thick, then add coriander leaves / dill leaves and remove it.
  5. Leave it to cool completely.

Step 3:

(For making the croissant)

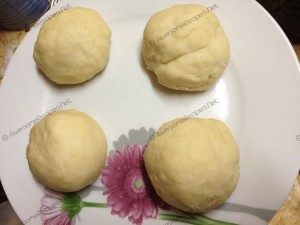
  1. Divide the dough into four parts.
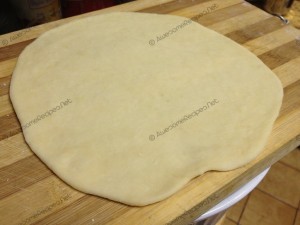
  2. Roll one part of the dough with the rolling pin to a round shape.
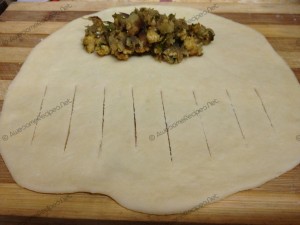
  3. With a knife, mark the cut on half side of the dough.
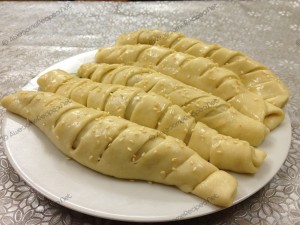
  4. To the other half of the dough add the filling and cover it and start folding the other half you will see the cuts on the upper side and don’t forget to fold the corners to make a croissant shape.
  5. Glaze the top of the croissant with egg beaten and sprinkle some sesame seeds over it.
  6. Place it in a warm place for 10 minutes and then bake it for 200 degrees for 10 to 12 minutes.
  7. After taking from oven apply butter over it and cover it with a cloth for 2 minutes to soften the croissants.
  8. Garnish it as you like and serve it.

chicken-croissant1chicken-croissant2

chicken-croissant3chicken-croissant4

chicken-croissant5

chicken-croissant6


Butter Naan

Butter Naan

In Bread Recipes On May 12, 2012 1 Comment

Butter Naan:

Butter Naan is a leavened bread with a butter coating over it. It is very famous in India and will be there in every Indian restaurant. Butter Naan really goes well with some thick gravy may be veg or non veg. Some people like garlic naan which is just another version of Naan. Whatever may be the version Butter Naan tastes very delicious and definitely it is going to be your mommy’s favorite dish too. So celebrate this mother’s day with butter naan and surprise your mother. As this is the very easiest way of making Naan and taste definitely like a restaurant butter naan. Its also an yeast-less naan. This butter naan recipe is dedicated to all mothers and HAPPY Mother’s Day :)

Method to prepare Butter Naan:

  1. Sieve all the dry ingredients such as maida, baking powder, baking soda and salt in a wide bowl and mix it evenly.
  2. To the mixture add the yoghurt slowly and combine together well to form a dough.
  3. Knead the dough, now at this stage the dough will be more sticky and soft.
  4. To this dough add the final ingredient the lemon juice, mix well and cover the dough with a paper towel or cover it with a lid and leave it to ferment for 4 hours in a warm place.
  5. After 4 hours you will be seeing the dough will be bulged in size.
  6. You will find the dough to be sticky, but dont worry, sprinkle some dry flour over the dough and divide it into 4 -5 equal parts.
  7. Now take one ball and dust some dry flour on rolling board, and stretch out from all the sides, if it is difficult with your hands make use of a rolling pin and roll it for 1/4 inch thick. You can shape it as you want, I have tried heart shape too.
  8. Now for baking, place a skillet on the heat and when the skillet is hot put this naan on it roast it on both the side till you gets light golden spot. Then place a cooling rack in the flame of the stove and put the naan over it and roast it on both the side using a tong for a minute or two. Remove it and brush it with some butter.
  9. Serve butter naan hot with butter chicken, rogan josh or chicken kurma.

Butter Naan Recipe

Gulab Jamun

Gulab Jamun

In Desserts On April 13, 2012 0 Comments

Gulab Jamun:

Gulab Jamun is a very famous Indian dessert. The name Gulab Jamun originated from Persians, they called it as Gul-aab which means Rose water and Jamun is an Arabic dessert means “the Judge’s Bite” (Luqmat Al Qadi in Arabic). This dessert Gulab Jamun was very popular during the Mughal period. There should be only very few people who don’t like Gulab jamun. Its a perfect Indian recipe for all occasions especially marriages where they serve Gulab Jamun and ice cream in hot and cold combination. My five year old son jus love this recipe…he calls it as Gulab Jaanu, so sweet when he calls like that. It is a soft dumpling made out of khoya or milk powder with little all purpose flour as the key ingredients and left in a flavored sugar syrup called as chashni. What a mouth watering taste…

How to make Gulab Jamun:

  1. First make the sugar syrup or chashni by adding water, sugar, Rose Syrup, cardamoms and Saffron in a pot and boil it.
  2. Once it begins boiling, low down the heat to simmer.
  3. In the meantime, Heat up the oil on low medium heat and get ready for deep frying.
  4. For making the gulab jamun add in all dry ingredients such as the milk powder, all purpose flour, baking soda in a mixing bowl and mix well then add the melted butter and yogurt slowly. Make into a  dough and leave it to rest for 5- 8 minutes.
  5. Now take a little of the dough and make desired size balls. Make sure that they are smooth round balls and do not have any creases.
  6. Now here is an important step: Test the oil by dropping a little piece of dough in the oil, if the dough settles at the bottom for minute and then raises to the surface then the oil is ready for deep frying.
  7. Now gently drop 4-5 dumplings in the oil and keep rotating them till they get a even dark golden brown color.
  8. Once they get that color, remove them out into a paper towel.
  9. Now quickly boil the sugar syrup again and drop in the dumplings.
  10. Once you drop in the dumplings turn off the flame and cover the Gulab Jamuns with a lid and leave it cool at room temperature for an hour and then later can be refrigerated.
  11. Garnish as you like and serve the  Gulab Jamun hot or cold. I am sure you will get a mind blowing taste…:)
how-to-make-gulab-jamun
Keema Biryani

Keema Biryani

In Rice Recipes On April 8, 2012 0 Comments

Keema Biryani:

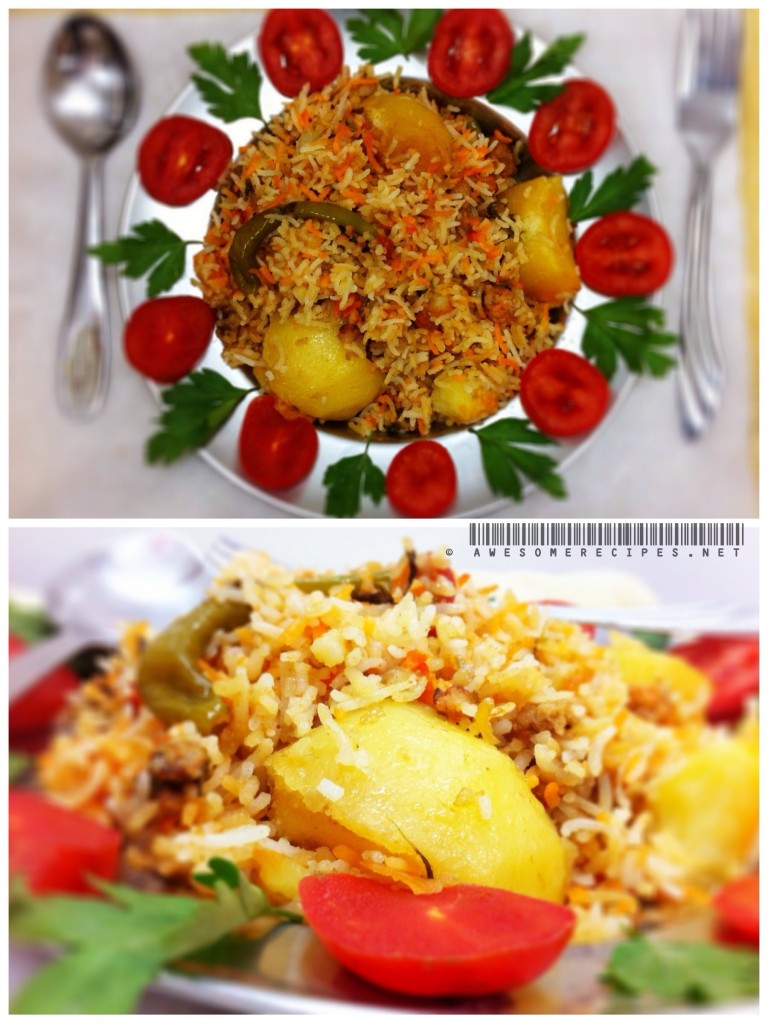
Keema Biryani or minced biryani is one of the variety of biryani dish.  As the mutton price is increasing day by day where some people cant afford to get it all the time, for them here is a simple and easy way to make keema biryani and relish the same briyani taste by using minced mutton or chicken. Keema Biryani is a rice dish made out of minced mutton or chicken with other spices and vegetables like potato etc. It is an ideal recipe to make, especially when you have plenty of guests at home. This keema biryani is one which certainly should not be missed out. It can be served with raita or onion salad.

Method to prepare Keema Biryani:

1. Soak the rice in water for 20 minutes, wash and drain it.

2. Heat the pressure cooker and add 3 to 4tbsp of ghee.

3. Now add the garam masala (Cinnamon, cardamoms and cloves) and saute gently.

4. Add the thinly sliced onions over a medium heat until quite brown and sticky.

5. When the onions are in nice golden brown color, add garlic paste and then ginger paste, stir fry for a minute.

6. Now add the Keema, tomatoes, potatoes, green chillies, coriander leaves, mint leaves, lemon juice, chilli powder, yoghurt, salt and stir it. Close the pressure cooker lid with the whistle on it.

7. After two whistles remove it from the heat and allow it to cool.

8. Meanwhile add the soaked rice to a cold water and bring it to boil. Boil it for 2 minutes and then drain it.

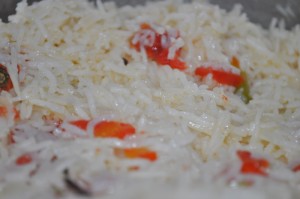
9. Now in another pan, spread one third of the partly cooked basmati rice on the base, then spread the keema sauce which prepared in cooker, then spread rice again evenly and add the remaining mixture of the sauce on the top.

10. Take a little amount of water or milk, add saffron food color and drizzle it over the top of the rice. This process of drizzling the color will create the rice grains of different colors in the final keema biryani.

11. Cover the pan with a lid and cook in a very low heat for 5 to 10 minutes. This process is called as Dum (in Urdu).

12. Finally remove it and gently mix the content and garnish it as you like.

13. Serve it hot with raita or onion salad.

Enjoy this Keema Biryani with your loved ones and let me know in comments whether it is whaack or wow. :)
Keema Rice
No Bake Cheesecake

No Bake CheeseCake

In Cake Recipes, Desserts On March 31, 2012 0 Comments

No Bake Cheesecake

No Bake Cheesecake is a simplest of all cheese cake recipes. You don’t need to bake or cook to make a cake. Follow this easy method to make No Bake Cheesecake and surprise your loved ones. You just need a refrigerator to make this cake. Isn’t it very easy…yummy cheese cake. My favorite, I m going to surprise my hubby on his birthday.

Method to prepare No Bake Cheesecake

1. Put the Digestive biscuits in a polythene bag and crush it using a rolling pin.
2. Melt the butter and mix it with the crushed biscuit for making the cheesecake base mixture.
3. Grease the cake tray (8”) with butter, pour the mixture into it and press it flat and evenly.
4. Leave this tray in the refrigerator while you prepare the filling.
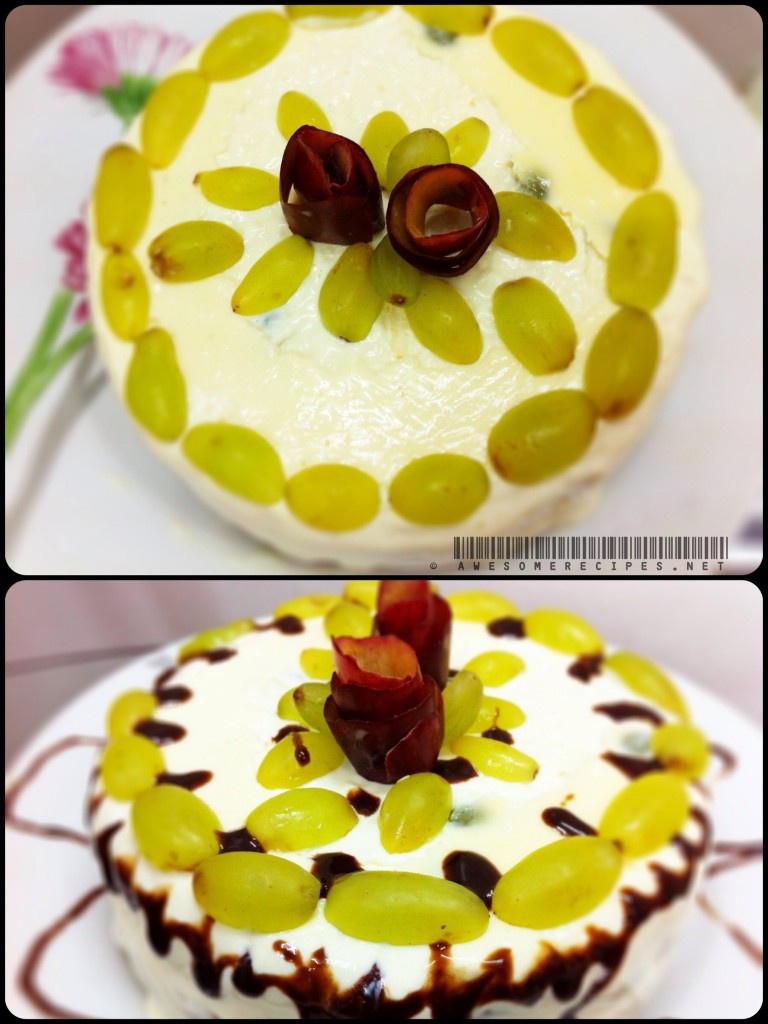
5. Now gently beat the cheese, cream, sugar and vanilla essence together until you get a smooth consistency. Add in about half the grapes.
6. Pour the mixture onto the cake base and chill it in the refrigerator for 2-3 hours to allow the cake to set.
7. Once the cake is set, remove it from the cake tray and place it on the plate.
8. Decorate with the remaining fruits and chocolate sauce.
9. Serve No Bake Cheesecake chill and Yummy.

Tips for No Bake Cheesecake:

Use any cheese perferably mascarpone cheese.
Can use any fruits strawberries, blueberries, kiwis, etc..

No Bake Cheese Cake
Best French Toast Recipe

Best French Toast Recipe

In Breakfast Recipes On March 22, 2012 2 Comments

Best French Toast Recipe:

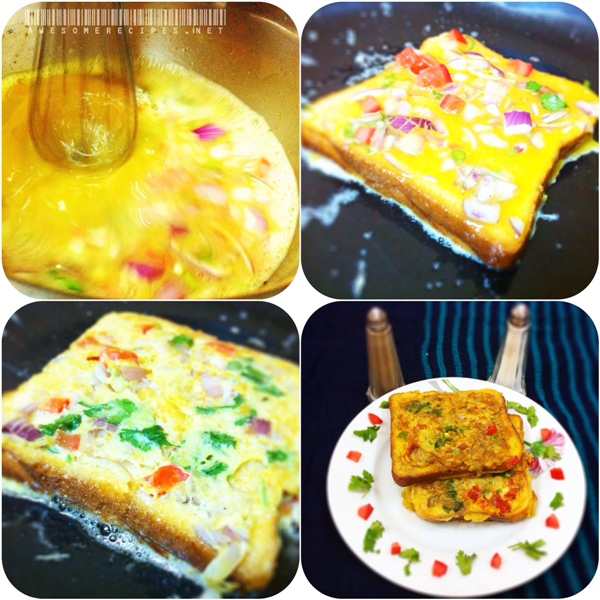
Spicy French toast is my son’s favorite snack and the spicy version will be one of the best french toast recipes. Best French Toast Recipe is a healthy breakfast for school and college going students. It can be made easily and in an inexpensive way. Best French Toast Recipe can be prepared in a sweet and spicy way. I love to prepare spicy french toast which is a recipe of bread soaked in spicy mixture of eggs then fried with little butter. It is quick, easy and nutritious where most of the ingredients are easily available in our kitchen. You will find this to be delicious more that the sweet version of the Best French Toast Recipe. Definitely you will have hard time stopping at one, you will go for another spicy french toast slice.

Method to prepare Best French Toast Recipe:

  1. Pour the eggs into a wide bowl beat thoroughly.
  2. Then add the chopped onion, tomato, chillies, turmeric, chilli powder, coriander, mint and salt to the beaten eggs and wisk it lightly.
  3. Heat the butter in a frying pan (preferably a non stick pan) on medium heat.
  4. Using a pair of tongs, take a slice of bread and dip both sides with the egg mixture.
  5. Now transfer the bread into the hot butter in the frying pan.
  6. Fry the bread on both sides until golden brown.
  7. Serve this hot and best French Toast Recipe with your favorite dip or sauce.

French Toast Recipe

Rogan Josh

Rogan Josh Recipe

In North Indian Recipes On March 21, 2012 7 Comments

Rogan Josh Recipe:

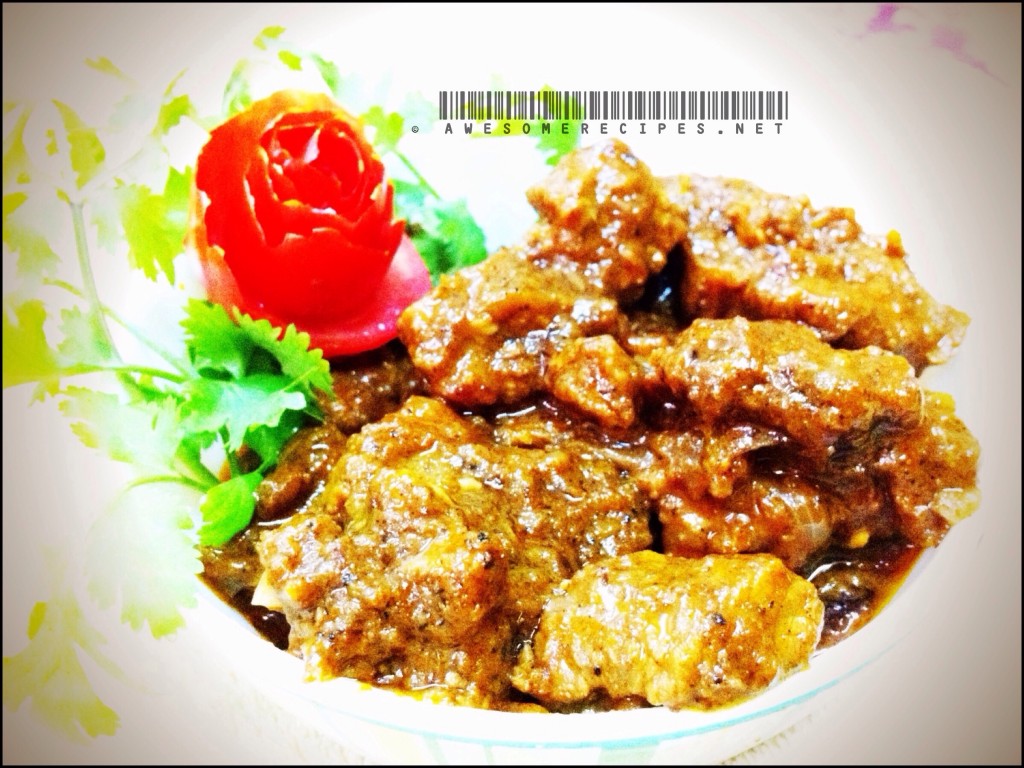
Rogan Josh Recipe is an aromatic lamb dish, especially originated from Kashmir so it a famous kashmiri dish. In North India some cooks ares often judged by his or her ability to prepare rogan josh recipe. Consequently, there are a number of recipes for this Rogan Josh and some cooks insist a very long list of ingredients. But the secret of Rogan Josh Recipe lies not so much in the number of ingredients as in the way they are put together. If you are newly married then here is the chance to impress your mother-in-law. :) This Rogan Josh Recipe dish seems to be tough but it is very simple and easy. So, here is the method to prepare Rogan Josh Recipe.

Preparation of Rogan Josh Recipe:

  • Wash and cut the meat into one inch cubes into a bowl and add yogurt to it and mix well.
  • Cover the bowl and leave it for 2 -3 hours.
  • Meanwhile, slice the onions and fry it in the ghee in a pressure cooker, until it becomes golden brown.
  • Liquidize the chopped ginger and garlic along with the water and add to the onions, cook for 10 minutes in a medium heat.
  • Add the rest of the ingredients (garam masala, black ground pepper powder, cumin seeds powder, chilli powder, turmeric powder and salt).
  • Add Tomato puree/paste and stir for 5 minutes.
  • Close the pressure cooker with the whistle on and try to cook until you get 4-5 whistles. Leave it to cool.
  • Garnish with some coriander leaves and tomatoes.
  • Serve hot rogan josh recipe with Bagara Rice, kabsa rice, rice pulav, roti, chappati, porata or even khubus.

Lamb Rogan Josh

Rogan Josh Recipe

Bajji

Bajji

In South Indian Recipes On March 17, 2012 2 Comments

Bajji Recipe:

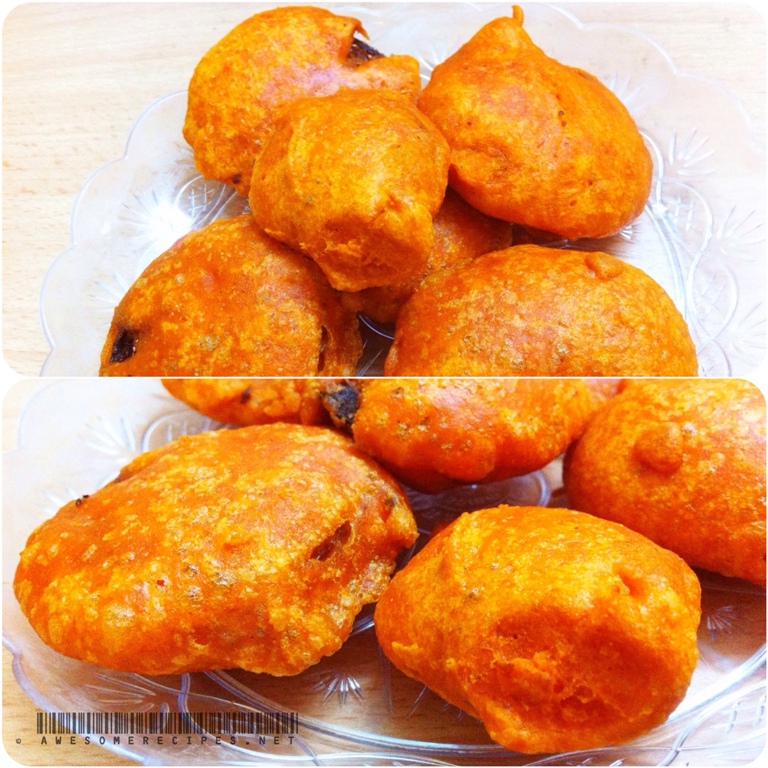
We all know Chennai (in South India) is famous for Marina Beach and Marina Beach is famous for Bajji. Yes, bajji is the popular south Indian snack and found almost everywhere in the streets as well as in the beach sold by the roadside food vendors. You can find a different varieties namely, vazhakkai (plantain) bajji, Capsicum Bajji, Chilli (molaga) bajji, Potato Bajji, Onion bajji, etc. It is very easy to make and it is a incredibly yummy and a crispy snack in an awesome rainy evenings. It is usually prepared by dipping any sliced vegetables of your choice like onion, capsicum, plantain, potato, etc in a batter made out of gram flour and frying it. Here I am gonna tell you how to prepare an onion bajji recipe in a very simple and easy way. I really love the way my mom-n-law prepares Onion Bajji.

Onion Bajji Recipe Preparation:

  • In a bowl add the above ingredients ( Gram flour, rice flour, chilli powder, baking soda, asafoetida, food color and salt) and mix it evenly.
  • Add water little by little to this mixture until the batter becomes neither thick nor too thin.
  • Cut the onions into thin slices.
  • Heat the oil in a wide kadai or pan.
  • Dip the onion slices into the batter just make sure that it is well coated on both sides.
  • Drop the bajji into the oil slowly and fry them for 2 minutes gently turn them over.
  • Fry the bajji on both sides till it turns into crispy golden brown.
  • Remove the bajji from heat and drain the excess oil with a kitchen tissue.
  • Serve it hot with coriander dip (pudina chutney).

Bajji Recipe

Adai Recipe

Adai Recipe

In South Indian Recipes On March 15, 2012 6 Comments

Adai Recipe:

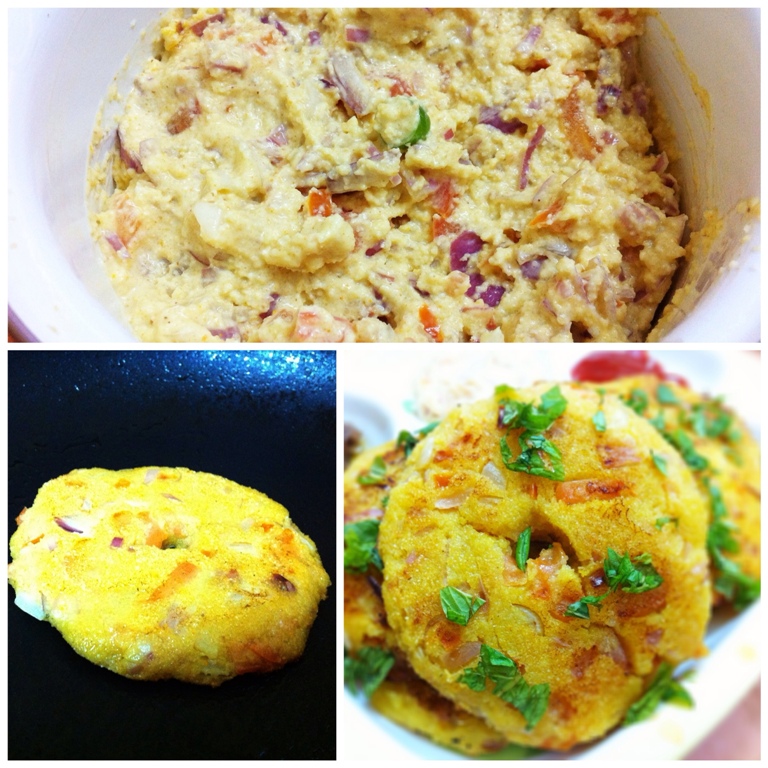
Adai recipe is a quick South Indian breakfast or snack just made in 15 mins. Adai recipe is a savory pancake usually made out of rice, semolina and lentils. Adai recipe is rich in nutrition and proteins. A healthy food for all ages. Adai can be made like a dosa or vada type. Here, my favorite is the Rava adai. It is very quick dish which can be made in few minutes. There are many varieties in adai but this is an instant recipe. Sometimes I used to have this as a morning breakfast in my college days.

Preparation of Adai Recipe:

  1. Mix all the above ingredients (Semolina, yoghurt, finely chopped onion, tomatoes, green chilies, coriander, curry leaves and required amount of salt) evenly.
  2. Make it into dough, the consistency should not be too thick or too thin and divide the portion into equal size balls.
  3. Heat the pan or tawa.
  4. Take one of the balls and place it on the plastic sheet, then pat the dough evenly and make a hole in the center with your finger as you do for a vada recipe and put it into the tawa.
  5. Now fry the adai for about for 2-3 minutes on each side until it is golden brown in a medium flame.
  6. Remove it from the heat and garnish with some mint leaves.
  7. Serve the adai recipe hot with mango pickles or mayonnaise or hot sauce.

Adai Recipe Tip:

Always use a bowl of water and wet your hands before you pat the adai recipe.

adai

Rasgulla Recipe

Rasgulla Recipe

In Desserts On March 13, 2012 2 Comments

Rasgulla Recipe:

Rasgulla Recipe is a delicious sweet syrupy Indian desserts. Rasgulla Recipe is made out of cheese which is called as paneer in Hindi. It originated from Orissa where it is called as Khira mohana and very famous throughout North India especially in Bengal and famously known as a Bengali sweet. This Rasgulla Recipe dessert is made out of Chhena (Indian cheese cottage) boiled in the syrup of sugar and water. Rasgulla Recipes are usually served chilled and in some place like Bhubaneswar these rasagullas are served hot and garnished with rose water, saffron and pistachios. Here is how you should prepare Rasgulla Recipe.

Preparation of Rasgulla Recipe:

  • Boil the milk in medium heat.
  • Once you got the full boiled milk remove it from the heat.
  • Add Vinegar to make the milk curdle and now you can see the whey(water residue) separates from the paneer.
  • Now leave it for about 5 minutes for the paneer (Indian cottage cheese) to settle down.
  • Then strain it with cheesecloth or a thin piece of white fabric cloth
  • Wash the paneer under cold water for a minute which will remove the vinegar.
  • Then tie the cheesecloth and hang it to drain.
  • After 2 hours spread the chhena (Indian cottage cheese) on the plate and knead it slowly for 5 min until it becomes very smooth dough.
  • Divide the dough into 10 -12 small portions and roll them into small balls and keep it aside.
  • Boil the sugar and water in a pressure cooker.
  • When the sugar is completely dissolved in the water, gently drop the paneer balls inside and close it with the pressure cooker with the whistle on and try to cook till you get one whistle.
  • Let it cool for few minutes. You will find the rasgulla to be spongy and doubled in size.
  • Add 1tsp of rose water.
  • Refrigerate it, garnish with saffron strands (I used cake sprinkles) and serve rasgulla recipe chilled.

Rasgulla

onion-salad

Onion Salad

In Salad Recipes On March 13, 2012 4 Comments

Onion Salad:

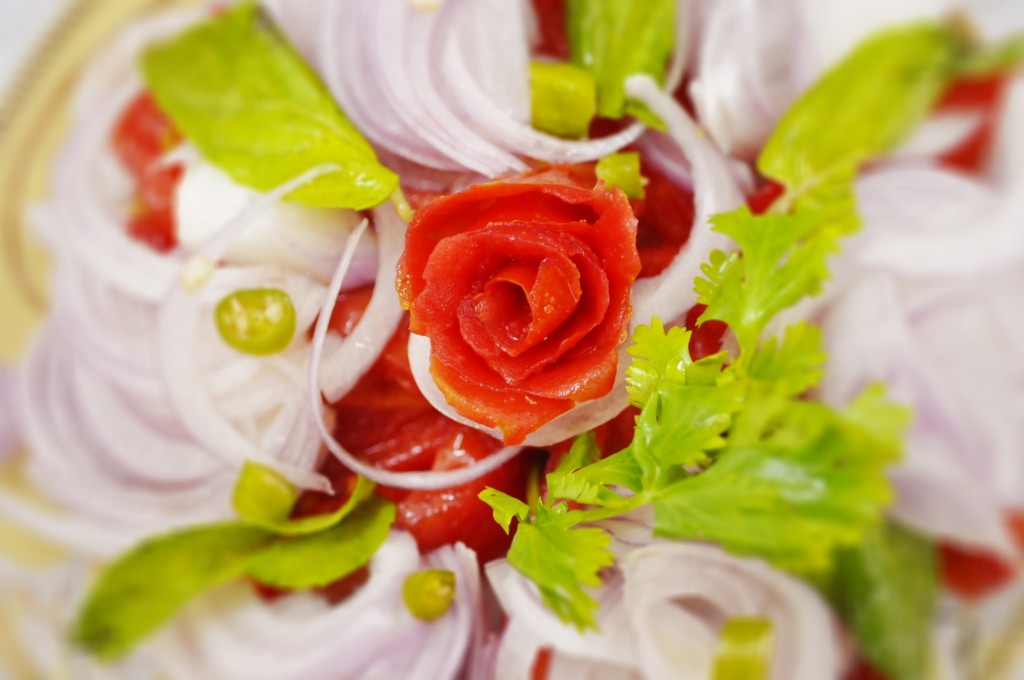
Onion Salads are the most adaptable one of all dishes including flavors coming from all over the world. Onion Salads are usually served with a dressing which includes garnishing with other vegetables. Onion salad is a quick and easy salad to prepare any time for any dish. Onion Salad can be served with Bagara Rice, Biryani, Curries, Dhal, etc. This onion salad is good for digestion after a heavy meal. I have garnished this salad with my imagination. You can also add your favorite herbs and vegetables to it. Here is the simple method to make Onion salad.

Preparation of Onion Salad:

  • Slice the onions, tomatoes thin and chop the green chilies.
  • Mix the chopped vegetables with lemon juice, olive oil and salt.
  • Garnish it with the coriander and mint leaves.
  • Serve it at the room temperature or chilled.

Tips for garnishing onion salad:

Peel the tomato and roll the skin of the tomato to form a rose.

Onion Salad Recipe

cappuccino-recipe

Cappuccino Coffee

In Beverage Drinks On March 12, 2012 1 Comment

Cappuccino Coffee:

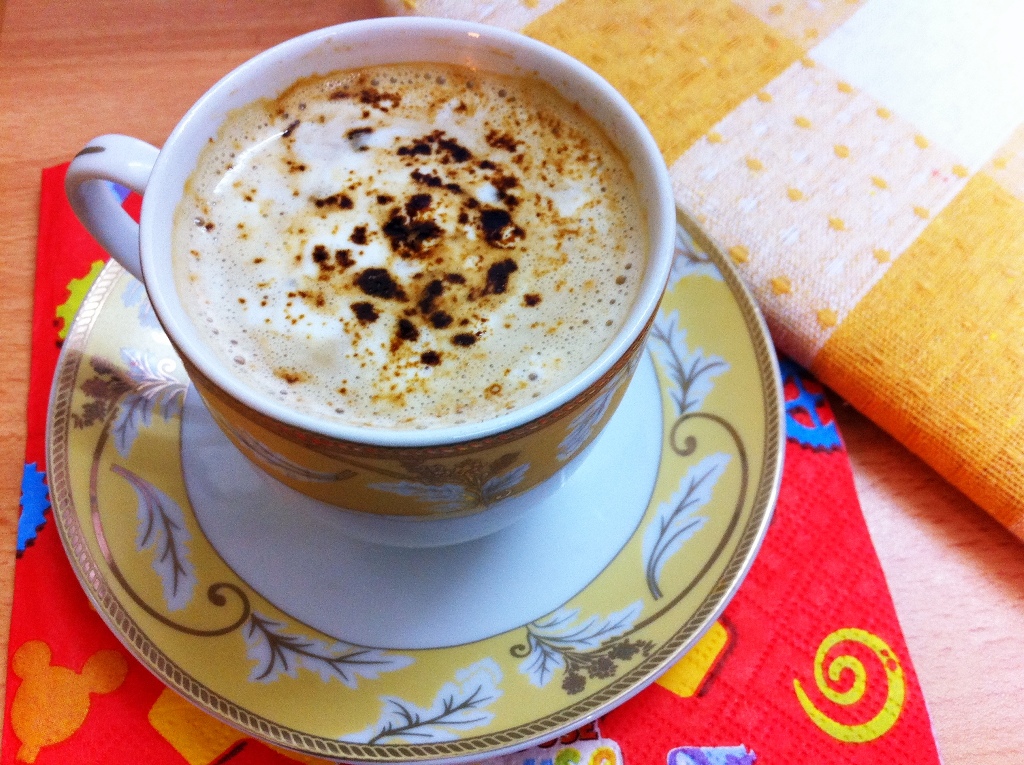
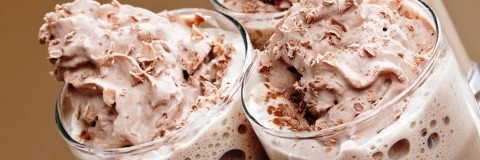
A Cappuccino Coffee is a espresso beverage foamed with whipped milk cream. This Cappuccino Coffee comprise of espresso poured into the bottom third of the cup, followed by a some amount of hot milk and last third of the drink consists of milk foam. Using a Toothpick we can make some artistic drawing on the top of the milk foam. This art of drawing on the milk foam is called as Latte Art. Cinnamon, raw sugar, shaved chocolate or additional spices are usually sprinkled on top of the finished Cappuccino Coffee drink. Cappuccino Coffee’s are served hot with a teaspoon and then consumed.

Preparation of Cappuccino Coffee:

  • Mix the above ingredients (creamer, instant coffee, chocolate drink mix, sugar, cinnamon, and nutmeg) on a bowl.
  • Preserve it in an airtight container for future use.
  • Mix 2 tablespoons of the preserved mixture with one cup of boiling water.
  • Garnish along with whipped milk cream and decorate it as you like.
  • Serve it hot and your hubby will like it. :)

Cappuccino Coffee

Parota

Porata

In South Indian Recipes On March 9, 2012 2 Comments

Porata:

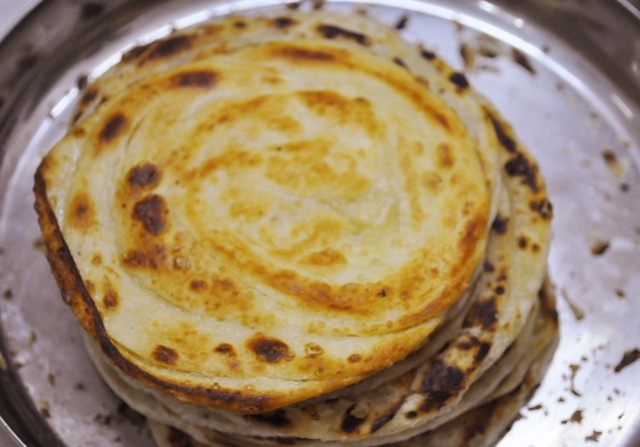
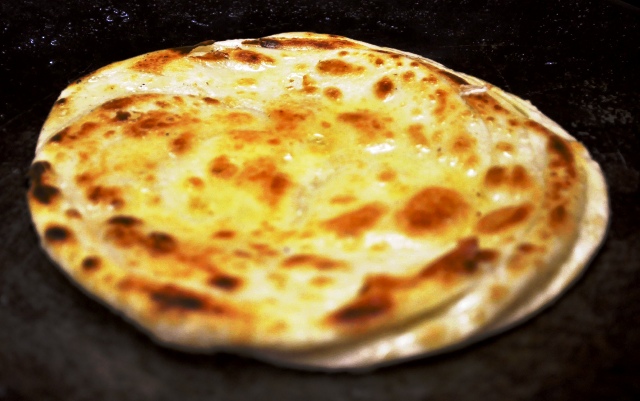
Porata, parotta or barotta is a famous south Indian food recipe especially in TamilNadu and Kerala. Porata is well known  as  a wonderful street side recipe. This Porata was introduced by the South Indians and served in religious festivals and feasts. Porata is famous because of its Flaky, crispy, fluffy, soft circular bread layers made with Maida (all purpose flour) and oil or ghee. This Indian layered bread Porata’s are relished with Mutton saalna, chicken Kurma, vegetable kurma or even paaya (mutton leg kurma). The other flavor or kinds of this Porata are the Kothu Parotta and Muttai Parotta.

Porata Preparation:

  • Take a wide bowl and add the above ingredients (Maida, baking powder, salt, baking soda, 2 tbsp of ghee) and mix them all evenly.
  • Add water little by little and mix it into a soft dough
  • To this dough add 2 tbsp oil and mix it about 20 mins and keep aside for 2 hrs.
  • Then again beat and mix the dough for a soft consistency.
  • Divide the dough into 8-10 balls in the size of a big lemon.
  • Take one portion of the dough and roll it with the help of a rolling pin.
  • Apply 1 tsp of oil for each parotta and stretch it to paper thin size. Stretch it with a rolling pin or your hands, but note that you apply oil as it makes the work easier.
  • After stretching the parota try making pleats with your hands and fold as you do to make a paper fan.
  • Hold one end as a centric and roll the other end till it become a wheel-like and press it with the center of your palm.
  • Repeat the whole process for each Porata
  • Brush a little oil on the top of each Porata balls and keep aside. .
  • After 30 mins, keep the tawa hot.
  • Take a porata ball and slightly roll it lengthwise and width-wise using a rolling pin. Do not flip the other side while rolling, as it should be firm on the bottom.
  • Transfer it to the tawa and let cook for few 2 minutes, now flip it on the other side and pour a tsp of oil, flip it one more time and then remove it from the tawa.
  • Using both hands, try to beat it once, just like you clap, this is to separate the layers.
  • Serve hot porata with mutton kurma or paaya.
parotta recipe
Parotta
Porata
Shrimp Patties

Shrimp Patties

In Seafood Recipes On March 9, 2012 0 Comments

Shrimp Patties:

Shrimp Patties is a delicious snack for an evening break. They are lightly spiced and served hot, these tasty, excellent little snack go extremely well with Pre-dinner drinks, and also make a very speedy lunchtime snack. The preparation of shrimp patties is super easy that you can surprise your loved ones anytime.

Shrimp Patties Preparation:

  • In a Large bowl mix the above ingredients (shrimps, onion, chili, ginger, coriander, fresh breadcrumbs, turmeric, lime juice, and beaten egg) together with your hands until it is completely mixed.
  • Now divide the mixture into 8 to 10 equal-sized parts.
  • Roll the mixture round and flatten into patties.
  • In a large plate put the dried breadcrumbs and dip each patty both front and back side to coat evenly.
  • Heat the oil in a frying pan.
  • Now fry the shrimp patties for about for 5-6 minutes on each side until it is golden brown.
  • Remove them and drain the shrimp patties on kitchen paper.
  • Garnish the shrimp patties with fresh coriander and serve it.

Enjoy this quick and simple Shrimp Patties with your family.

Kunafa Recipe

Kunafa Recipe

In Desserts On March 7, 2012 1 Comment

Kunafa | Kanafe | Kanafeh | Knafeh | Kunafeh | Kunafah | كنافة | Kunafa Recipe

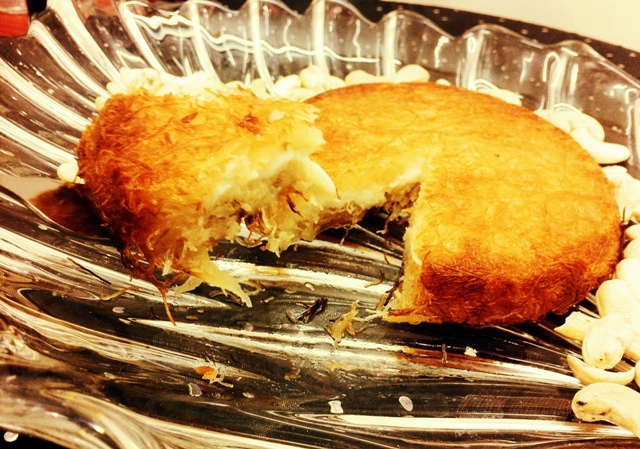
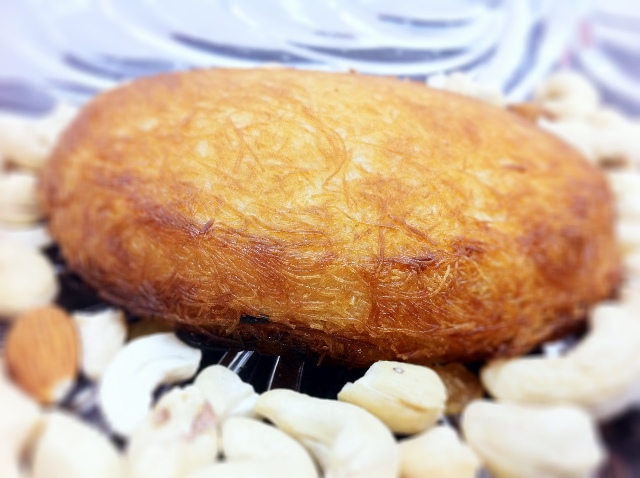
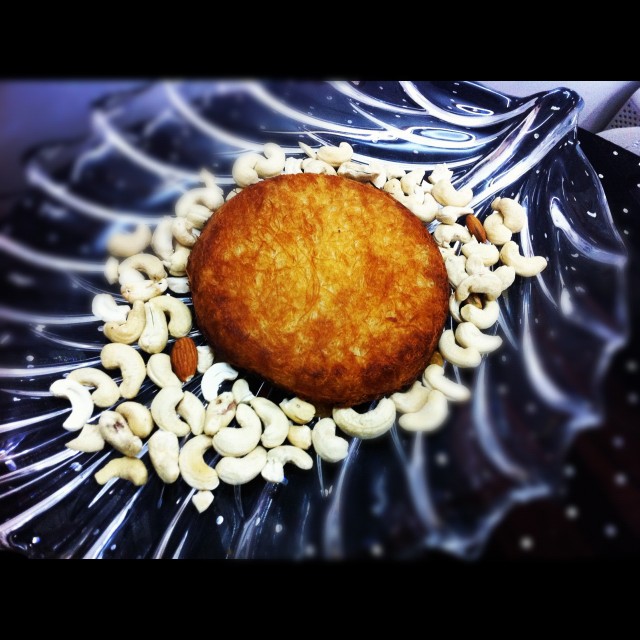
Kunafa recipe is a traditional Arabic sweet or dessert made from Kathafi which is a very fine vermicelli-like phyllo pastry found especially in middle eastern countries. It is also called as Kanafeh in turkish language. Kunafa is also sometimes known as shredded phyllo as it is mixed layer of shredded phyllo with a creamy cheese filling in the middle combined with another layer. Kunafa recipe is served with a flavored syrup of rose water or orange water. It is a best served dish in the gulf countries including Saudi Arabia and Emirates especially during Ramadan festival season, as people prepare kunafa recipe for iftiar. I love Kunafa recipe as its crunchy and creamy in taste. Here is an easy method to prepare Kunafa recipe  at home by yourself.

Preparation of Kunafa Recipe:

  • First Pre-heat the oven to 380 degrees Fahrenheit.
  • Take a big bowl and crumble the kataifi together with your hands
  • Now add the melted butter into the bowl and mix the Kataifi with it thoroughly.
  • On a greased pan put half of the mixture of the Kataifi and butter in the bottom and spread it out as a crust and keep it apart.
  • Preparation for the cream: Mix the ricotta cheese and mozzarella cheese in a big bowl. Take a pan and slowly heat the milk for a minute and then add the semolina and cook for 30 seconds, now combine this mixture with the cheese.
  • Pour the cheese mixture on top of the kataifi crust in the pan and spread it evenly
  • Put the remaining kataifi mixture on top of the cheese to form another crust on the top.
  • Place the pan in oven and cook it at 350-400 degrees for 40- 45 minutes until the crust on the top is golden brown.
  • Remove it from the oven and let it stand for 30 minutes,
  • Then invert the Kunafa onto a nice plate
  • Pour the syrup over it and serve it.
  • Garnish with cashew nuts

Do it yourself Kunafa recipe and enjoy this arabic dessert at your home.

Vada Recipe

Vada recipe

In South Indian Breakfast On March 6, 2012 0 Comments

Vada Recipe:

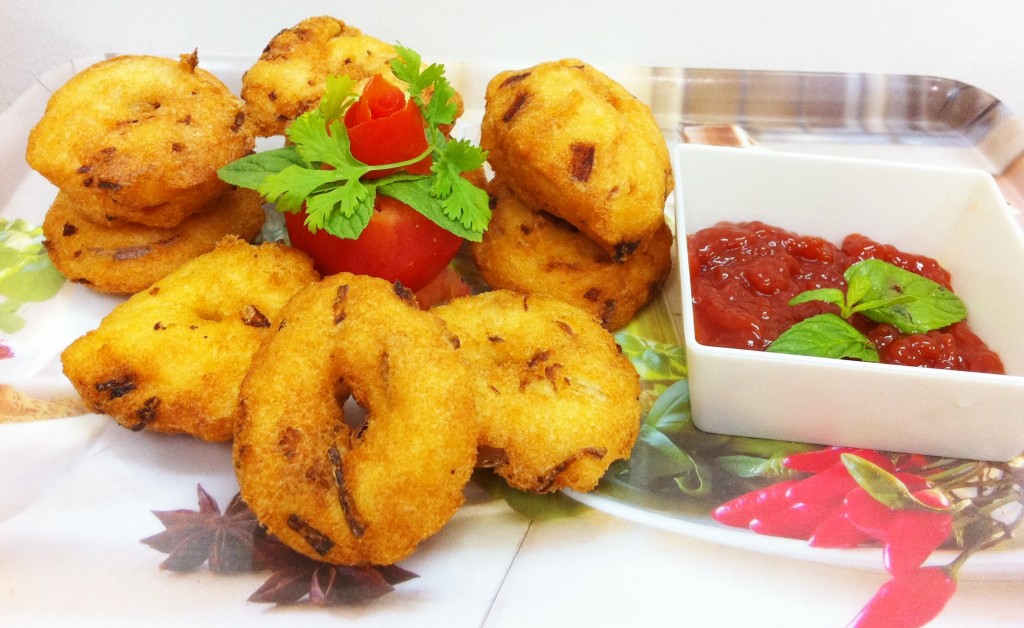
Vada recipe or medu vada is a famous South Indian delicacy. These crispy vada’s are a favorite snack which is loved by all. This vada recipe is served with sambhar, coconut chutney, or tomato chutney. If you have been to India, especially to South India every single restaurant will have this vada recipe in their menu. The flavor of this vada is awesome as the added ingredients to give that delightful taste. My mom use to make this snack very often and I love it. Here is a simple preparation method to make this vada recipe.

Preparation of Vada Recipe:

  • Wash and soak the Urad dal for 4 hours before cooking.
  • Grind the soaked urad dal for a smooth batter with little water.
  • Now to the batter add the above ingrediants (pepper, green chilli, onion, curry leaves, and salt)
  • Heat the oil in a large pan or a kadai.
  • Place a thick plastic sheet in your hand.
  • Take a little of batter and place it on the plastic sheet, then flatten the batter evenly and make a hole in the center with your finger and put it into the oil for deep frying.
  • Keep a bowl of water beside you and dip your hands in water every time you take the batter to make the vada.
  • Fry the vadas till they become evenly browned and crispy.
  • Drain the vadas on a tissue paper to take away excess oil.
  • Serve the vadas, hot with sambaar or coconut dips or tomato dips.

Tips while preparing Vada Recipe:

If the Urad dal batter becomes watery, then add some semolina to the batter for an instant fix. Put a pinch of bicarbonate soda (aka.. Idli Soda, baking soda) to the batter to get a crispy vada recipe.

Vadai Recipe


falooda recipe

Falooda

In Beverage Drinks On February 29, 2012 6 Comments

About Falooda:

Falooda or Faluda is usually a traditional chilled dessert or beverage in Southern Asian countries created mainly through blending rose syrup with vermicelli and tapioca pearls together with both milk and water. Falooda is undoubtedly a recipe from the Persian dessert Faloodeh and was however exposed to the India in the Mughal period. Basil seeds (sabza), tutti frutti, sugar, and ice cream could be use to add flavor and taste. The vermicelli is used additionally. The rose syrup might be replaced with an additional tasting base to make kesar, mango, chocolate, and fig Falooda. Falooda is usually summer drink throughout the south Asian countries like Pakistan, India, iran, Bangladesh, Sri Lanka, Myanmar, and also in some of the Middle Eastern countries due to the hot climate. In Bangladesh, in the south coast of the country the faluda is made with pistachios, Shagu pearls, Ketaki (pandan) extract, mango and creamed coconut and mango.

Preparing Falooda:

  1. Heat the milk along with the sugar.
  2. Bring it to boil and keep aside to cool.
  3. Add the soaked basil seeds or subza to the milk, stir it and then refrigerate.
  4. Take a glass and layer the glass with two tsp of rose syrup and three tablespoons of falooda and a scoop of ice cream.
  5. Garnish with chopped pistachios, cashews and badam.
  6. Serve it cool.
Basundi Recipe

Basundi

In Desserts On February 28, 2012 0 Comments

Basundi:

Basundi is definitely an Indian dessert mainly made in Maharashtra, Gujarat, Bihar and Karnataka. Basundi is a sweetened thick milk made by boiling the milk on low flame heat until the milk is reduced by half to get a thicker consistency. Cream can be added in the process of boiling to speed up the thickening procedure. When lowered, slightly add sugar, cardamom, Buchanania seeds which are also called as Charoli or saffron. This sweet dessert is usually served cold, usually garnished with pieces of pistachios and almonds. This Basundi recipe is prepared in different styles like Sitaphal (like Custard apple) Basundi and Angoor Basundi which is Basundi with Rasgullas in it.

Preparation of Basundi Recipe:

  1. Soak the almonds and cashew for 15 minutes and blend it and keep it aside.
  2. Reserve few almonds and cashew for garnishing.
  3. Boil the milk in a simmer low heat till the milk coats the back of the spoon.
  4. Stir the paste of almonds and cashew with a cup of milk and then mix it with the milk that was boiled.
  5. Add sugar and saffron and cook it till the sugar dissolves.
  6. Refrigerate it and garnish with sliced almonds, pistachios and cashews.
  7. Serve it cool.

Tip while making Basundi:

  • Use a broad and flat pan to boil milk.
Mocha-Espresso

Mocha Espresso

In Beverage Drinks On February 25, 2012 0 Comments

What is Mocha Espresso:

Mocha Espresso is an often ordered beverage by the youth today, especially people in call centers. It is made out of milk with added chocolate and cocoa powder. Just like cappuccino, Mocha Espresso includes the well-known milk froth on the top, and also sometimes served with whipped cream instead. Mocha Espresso is topped along with a sprinkle of either cocoa powder or cinnamon according to taste. Chocolate buttons can also be additionally added on the top for the flavoring and decoration for Mocha Espresso recipe.

Another kind of mocha espresso is White Mocha which is made with white chocolate rather than milk or dark chocolate. Another variety is the mixing of two different syrups like black and white mocha, tan mocha, marble mocha and tuxedo mocha.

Method for making Mocha Espresso:

  • Place all the ingredients (Milk, sugar, coffee powder, crushed ice and chocolate ice-cream) into a blender or food processor.
  • Blend it perfectly.
  • Drizzle the chocolate sauce in the glasses and preserve this in the refrigerator especially freezer for couple of minutes.
  • After that pour mocha espresso in glasses.
  • Ready to serve with…Yummy…
basbousa-recipe

Basbousa Recipe

In Desserts On February 24, 2012 4 Comments

Basbousa Recipe:

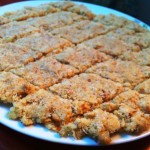
Basbousa or sweet semolina cake with rose water and lemon syrup is extremely popular in Middle East and also throughout Egypt. Basbousa Recipe are usually prepared in a large tray, and cut into diamond or square shapes with any type of nuts like almond, pistachios, cashew or pea nut in the center of each piece for decoration and finally soaked with the delicious sweet syrup on it. Aah Heavenly taste.!

Preparation of Basbousa Recipe:

  1. Take bowl, mix the above ingredients (semolina, coconut, caster sugar, self raising flour, yoghurt, melted butter and vanilla).
  2. Spread the mixture into a greased baking tray.
  3. And cut into diamond shapes.
  4. Put one almond in the centre of each diamond.
  5. Place the tray in an oven at 180 degree Celsius for 30-40 min until it is golden brown.

Preparation of Syrup for Basbousa Recipe:

    1. Place a pan and bring suger and water to a boil until the sugar dissolves.
    2. Low down the flame for 5 min and then stir lemon juice and rosewater.
    3. Take away from the heat and now allow it to cool.
    4. Pour the syrup over the Basbousa Recipe cake, let it cool at room temperature and serve it.
kaju-katli-recipe

Kaju Katli Recipe

In Sweets and Savories On February 23, 2012 0 Comments

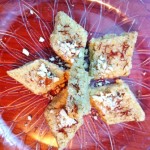
Kaju katli recipe is really a favorite Indian special sweet made from powdered cashew nut , sugar, and with a pinch of cardamom powder for that exotic aroma. Kaju katli recipe are famous during the festivals like Diwali. Especially its is all time favorite sweet recipe for kids as its mouth watering taste makes your kid to say “mommy one more pleaseeeeeee”!

Kaju Katli Recipe Preparation:

1. Soak the cashews (Kajus) for 15 mins.

2. Then blend the soaked cashews along with the sugar and milk in a blender.

3. Heat up the pan in a low flame.

4. Add the butter or ghee along with the cardamom powder.

5. Now add the blended batter of cashew to the pan.

6. Stir constantly until the mixture becomes thicker.

7. Make sure it doesn’t burns from the sides, so keep stirring for 15 minutes.

8. Put the content into a greased pan and spread it out all over the pan

8. Cool it and cut into diamond shape

9. Garnish the barfi with varakh (silver leaves)

Health benefits in eating Kaju Katli Recipe:

1. Cashews contain an anacardic acid which fights against the teeth infection.

2. Cardamoms is used to cure the teeth and gum infection and also used for cold, cough and also digestive disorders.

3. Milk contains proteins which is essential for growing.

4. Butter prevents the skin allergies as it rich in fatty acids.

Share Kaju Katli Recipe with your friends and do share your thoughtful comments below.

coconut-burfi-recipe

Coconut Burfi Recipe

In Sweets and Savories On February 21, 2012 2 Comments

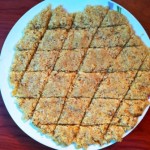
Coconut burfi recipe is one of my favorite sweets. It is a sweet, sugary, delicious, flavored and chewy made out of dry shredded coconut powder, condensed milk and pinch of cardamom. This coconut burfi recipe is really very simple and easy it can be made in just 10 minutes and it taste absolutely heavenly. It is named as ‘Khobbri mithai’ in Kannada and ‘Naralachi Vadi’ or ‘Khobarychi Vadi’ in Marathi.

Preparation of Coconut Burfi Recipe:

1)  Place the pan on the stove at sim or low flame.

2)  Roast the coconut gently until you get the smell or the aroma of the roasted coconut.

3)  Add Condensed milk along with cardamom powder.

4)  Constantly stir the mixture until 2 to 3 minutes.

5)  Pour this mixture into a baking dish coated with butter.

6)  Spread it evenly over the baking dish using a spatula and leave it cool.

7)  Refrigerate the burfi for about 1 hour and then start cutting the burfi into diamond shape.

8)  You can also garnish it with varakh or saffron to garnish.

Note: You can preserve it for a long time if you refrigerate it in an air tight container. Enjoy Coconut Burfi recipe and let us know how it tasted.

Bagara Khana

Bagara Rice

In Rice Recipes On December 8, 2011 2 Comments

Bagara Rice is the most popular dish among the Urdu speaking people. It is a mixture of spices with basmati rice. The origin of this bagara rice started in Hyderabad. Vegetarians in Hyderabad used to enjoy bagara rice apart from biryani for which the city is famous for. This bagara rice is very similar to the Nei Chor (நெய் சோறு in Tamil) or Ghee rice of South India. The Bagara Rice is famously called as Bagara Khana in Urdu. They add roasted cashews and raisins to Ghee rice which is not added here. This bagara rice goes very good with Dalcha and Kurma. This Bagara rice is made in lot of Muslim festivals and marriages. So relish this dish enjoy its taste.

Preparation of Bagara Rice Recipe:

  1. Wash and soak the Basmati rice in water for about an hour.
  2. Heat oil and ghee in the deep broad vessel.
  3. Add the garam masala (cloves, cinnamon, bay leaf, star anise and green cardamom) and saute it till the aroma arises. Smells delicious right?
  4. Now add the thinly chopped onions and saute again till it become golden brown.
  5. Add a tablespoon of ginger garlic paste, salt and stir it well for a while
  6. And then add your tomatoes, green chilies, chopped coriander and mint and again stir it for a minute and then add two cups of water and bring to a boil.
  7. While the water is boiling, add the soaked rice and let it boil till the water is not fully absorbed but say three fourth of it.
  8. Now close the lid and keep something heavy on the lid and cook on a low flame for 10 minutes. This process in called giving Dum in Urdu.

Bagara Rice (bagara khana) or Khuska is now ready to serve. Serve it with Onion Salad, Raita, Dalcha, Mutton Kurma, Chicken Kurma, Kofta curry, etc.
Bagara RiceHealth Benefits of Ingredients used in Bagara Rice:

  • Do you all know that Basmati Rice are rich in High calorific value that mean if you consume 100g of basmati rice you will gain more than 100 calories and thus gaining you an instant energy. They also contain carbohydrates, proteins, lower in fat, rich source of vitamins, iron and gluten. Most of the variety of basmati rice doesn’t contain cholesterol in them and thus it is very nutritional to our health especially for heart, nervous system and digestive system.
  • Spices (Garam Masala): As I have mentioned in my previous post of Nargisi Kofta recipe spices provide anti-inflammatory benefits that is they provide balance blood sugars and act as a anti-oxidants. They improve cardiovascular health and blood circulation.
  • One more important ingredient is added here that is Star anise (chakra phool). This spice has more health benefits like it relieves abdominal discomfort, it is used as a expectorant and soothes cough and cold and mostly used in cough syrups. Consumption of this star anise promotes lactation for nursing mothers. And this is also used to treat acne, scabies and lice infections.
  • Onions and garlic are rich in a wide array of essential nutrients. Onions contain vitamins, mineral, zinc, potassium, protein, folic acid, calcium, fiber, flavonoids etc and garlic contain sulfur, selenium, arginine, falavonoids and oligosaccharides. Both garlic and onion act as antioxidants and can be treated for the prevention of cancer.
  • Tomatoes are the most versatile food ingredient and it contains vitamin C and vitamin E and the red pigment in tomatoes are called as lycopene which act as an antioxidant. Some research has indicated that consuming tomatoes can help older people stay active all day longer.
  • Mint is well known as mouth and breathes freshener and it is used to control digestion, nausea & headaches, respiratory disorders, cough, etc. This is also used to cure asthma and used for skin care. While coriander is used for the treatment of swellings, high cholesterol, conjunctivitis, blood sugar, menstrual disorders, diarrhea, skin disorder, etc.
If you cant get Star anise and bay leaf’s you can use cinnamon, cloves and green cardamon to get a good taste for Bagara rice recipe. Let us know how you cooked bagara rice at home by following our above do it yourself steps.
Peda Recipe

Peda Recipe

In Sweets and Savories On December 8, 2011 0 Comments

Peda recipe is a kind of sweet recipe made in India. Peda recipe are usually prepared thick or semi solid soft pieces which are quick and easy made treat in just 15 minutes. This peda recipe is a favorite dish for all ages, especially for children. They taste so soft and silky that the melts in our mouth. Peda recipe are usually prepared during the special occasions like birthdays, engagement parties or even for diwali, along with the doodh peda. It can be a delicious snack for an awesome evening with your relatives and friends. So, why are you waiting for? Try this simple yet an awesome peda recipe of how to prepare it.

Preparation of Peda Recipe:

1) Melt the butter in a microwave for 1 minute.

2) Mix the above ingredients (milk powder, Condensed milk and cocoa powder) along with the melted butter.

3) Place this on the microwave on high for 3 minutes, but gradually check after every 1 minute and stir the blend equally.

4) The last 1 minute is watched keenly because at this time you will find the blend containing bubbles.

5) Cool it and make the desired shape.

6) Garnish the peda recipe with chocolates, chips, nuts or gems.

Healthy Benefits and Medicinal tips of Peda Recipe:

1) Consuming cocoa decreases blood pressure, improve cholesterol levels. Some medical research says that the consumption of cocoa is beneficial for heart diseases as they are rich in polyphenolic flavonoids. These flavonoids are found in fruits, vegetables, coffee, tea and wine.

2) Milk contains calcium which builds a healthy bones and teeth; it also maintains the bone mass. It contains protein which serves as a source of energy and helps to repair our muscle tissue, milk also contains potassium, phosphorus, and some vitamins which helps to maintain the blood pressure, generate energy and maintains the immune system.

3) Butter is rich in fatty acids and minerals which prevent the most of diseases and support our immune functioning, boost metabolism and these fatty acids have some anti bacterial properties and they fight against pathogenic microorganisms.

Tips about Peda Recipe:

Peda recipe can be also made in stove instead of oven. But note that it is cooked in low shimmer flame. This is a healthy dish which can be given to children. Children will just love it and it is so easy that you can teach your loved ones on how to prepare peda recipe at home.

Kheer Recipe

Kheer Recipe

In Desserts On November 30, 2011 0 Comments

What is Kheer Recipe?

Kheer recipe is a traditional festival dish for all occasions and we used to do it in a house warming ceremony in India. It is also known as rice pudding adorned with pistachios, cashews and almonds, an easy and all time favorite dessert for every age. This Kheer is otherwise called as Phirni. The simple difference between Kheer and Phirni is the amount of milk. If the amount of milk is more, it is called Kheer and when the amount of milk is less then it is Phirni. This Kheer or Phirni are usually consumed along with Naan and badam Halwa in some of the Muslim marriages.

How to prepare Kheer Recipe:

  1. First wash and soak the Basmati rice in a cup of water for 15 minutes.
  2. Drain and pat dry using a muslin(white) cloth and grind the rice as nice as coarse powder.
  3. Drain the almonds and pistachios in one cup of hot water for 5 minutes. This will make easy to peel the skin of the almond and chop them into small pieces.
  4.  Heat the milk in a pan and bring it to boiling stage till the milk becomes thick with creamy foam at the top.
  5. Add the Basmati rice powder, sugar and generally cook on a low heat flame.
  6. When the rice is boiling add the cardamom powder, saffron and nuts and cook to shimmer on low heat flame till the rice is cooked completely.
  7. Once when the mixture is thick enough remove it from the heat flame and allow it to cool.
  8. Garnish with more chopped almonds and pistachios.
  9. Kheer recipe  is usually served in a small clay bowls which are also called as matkas.
  10. Kheer Recipe can be refrigerated and served. Ummmmm…Mouth watering isn’t it?

Tip to watch out while cooking Kheer Recipe:

To find out whether the boiling milk has become thicker (condensed) use a spoon and stir it, if you find the milk cream stuck behind the spoon then we can be sure that the milk is at the stage where we can add other ingredients.

Healthy benefits of Kheer Recipe:

  1. Milk is a major source for calcium, phosphorus, magnesium and protein which  are very essential for the development of bone, teeth and growth. Their consumption also reduces the risk for cardiovascular disease.
  2. Rice is rich in carbohydrate and vitamins which gives a fast instant energy, stabilizes the blood sugar, resistance to high blood pressure, dysentery and cardiac disease.
  3. Almonds are rich in vitamin E, calcium, phosphorous, iron and magnesium. It also contains copper, zinc, selenium and niacin. By eating almonds every day we can get relief from constipation, respiratory disorder, cold, cough, anemia, impotency and also diabetes and heart disease. It is also essential for healthy hair, skin care and dental care.
  4. Pistachios are the good source of phosphorus, copper, potassium and magnesium and thus they have a high nutritional value.

Try kheer recipe now and tell us how tasty it was by leaving your comments below. Also kindly do share this kheer recipe to your next door neighbor in Facebook and Twitter.

Nargisi Kofta

Nargisi Kofta Recipe

In Snack Recipes On November 30, 2011 4 Comments

What is Nargisi Kofta:

Nargisi Kofta or Nargisi Kebab is a Mughlai dish. The boiled eggs are encased by the layer of minced meat or chicken mixed with some hot spices and chopped onion and deep fried. This dish is called Nargisi Kofta. You can also use minced beef for this dish but I prefer Lamb which will get a awesome taste with this mixture.

How to prepare Nargisi Kofta:

  1. Start by putting Eggs in a pan of water and let it boil. Now boil the eggs for exact 6 minutes.
  2. When the eggs are boiling. grind the meat in a mixer or a food processor for 20-30 seconds while the meat is minced well then add the remaining ingredients ( Gram flour, chopped onion, green chillis, cumin powder, chilli powder and salt) and grind to a smooth paste or smooth dough.
  3. In meantime, after 6 minute remove the eggs from the pan and plunge them into cold water. This stops the yolk from discoloring. When the eggs are cooled crack the shells and peel it to take the boiled eggs out.
  4. Now make the dough and cut it into 4 pieces. First wet your hands in water and take a piece of dough and press it into a pattie then take one of your eggs put it in the middle of the pattie and work the dough around the egg and there we find a nice smooth ball. Now do the same for the other three eggs.
  5. Deep fry them until they are golden brown for 5- 6 minutes.
  6. Cut it in half and serve it with masala gravy or even it can make a great snack.
  7. Perfect yummy Nargisi Kofta is now ready to eat.

Tips for nargisi kofta recipe:

  • While making Nargisi Kofta make sure that you keep a cup of water so that you keep moisturizing your palm when folding the dough. This will prevent the dough from sticking to your hand.

5 healthy benefits of Nargisi Kofta‘s Ingredients:

  1. Lamb contain proteins, amino acids and zinc which will help you to keep up the immune system healthy. Lamb is also a good source for Vitamins B12, B3 which is necessary for vital nervous system.
  2. An egg contains high quality protein and essential amino acids which helps to regulate the brain, nervous system and cardiovascular system.
  3. Egg contains sulphur content in it as it regulate the growth of hair and nails.
  4. The spices provide anti-inflammatory benefits, act as anti-oxidants, balance blood sugars, and also improve blood circulation and cardiovascular health.
  5. Onions are rich in vitamins, folic acid, iron and they also have a anti-bacterial property. It is good for digestion purpose. Onions prevent anemia and general thinning of the blood cells. This contains vitamins which boost up your immune system.
Kindly share our Nargisi Kofta recipe with your friends in Facebook and don’t forget to leave us a comment about how it came up for you.
Creative Commons License
Awesome Recipes is licensed under a Creative Commons Attribution-NonCommercial-ShareAlike 3.0 Unported License.
Based on a work at awesomerecipes.net